
In previous OCR model parsing applications, Gradio has been used multiple times to deploy the frontend. For example, the homepage of minerU is deployed using Gradio.

So this article will serve as a beginner-friendly tutorial on Gradio.
Gradio is a Python library for quickly creating demonstration interfaces for machine learning and data science. No frontend knowledge is required—you can convert functions into interactive web applications with just a few lines of code. Below is a getting-started guide to help you quickly get up to speed with Gradio.
Gradio’s underlying architecture consists of two parts: a frontend framework and a backend framework. Its overall design revolves around the core goal of “quickly connecting Python functions with web interfaces,” enabling low-code interactive interface development. The following analysis covers its underlying core framework and core architecture:
I. Underlying Core Framework
Gradio relies on two major technology stacks: React (TypeScript) for the frontend and Flask (Python) for the backend, with real-time communication via WebSocket.
1. Frontend: Based on React + TypeScript
Gradio’s frontend interface is entirely built with React (supported by TypeScript for strong typing), responsible for user interaction, component rendering, and data display.
- Core Logic: The frontend transmits user inputs (such as text, images, button clicks) to the backend via the network, then receives the results returned by the backend and updates the interface.
- Component-Based Design: All interactive components provided by Gradio (such as
Textbox,Image,Button) are essentially encapsulated React components. Each component corresponds to a set of frontend rendering logic and data processing rules (e.g., image components handle format conversion and preview rendering). - Source Code Location: Frontend code is concentrated in the
frontend/directory of the repository, including component definitions (components/), state management, API communication, and other logic.
2. Backend: Based on Flask + WebSocket
Gradio’s backend is a Python-implemented service, corely relying on Flask (a lightweight web framework). It handles HTTP requests, calls user-defined functions (such as model inference functions), and enables real-time two-way communication via WebSocket.
- Role of Flask
- Acts as a web server, hosting frontend static resources (JS, CSS, HTML) and handling users’ initial page access requests.
- Provides HTTP interfaces for handling non-real-time data interactions (such as initial configuration, file uploads).
- Role of WebSocket For real-time interaction scenarios (such as instantly returning results after user text input, or dynamically updating outputs when dragging a slider), Gradio implements WebSocket communication through the
Flask-SocketIOextension. This avoids the inefficiency of HTTP polling and ensures real-time data synchronization between the frontend and backend.
- Core Logic: The backend parses serialized data, converts it into native Python types (such as strings, PIL Images, numpy arrays), calls the user-defined
fnfunction (such as a model prediction function) with the parsed parameters, and pushes the output results back to the frontend via WebSocket to trigger interface updates. - Source Code Location: Backend code is concentrated in the
gradio/directory, whereapp.pydefines the Flask application instance,routes.pyhandles HTTP routes, andsocketio.pyprocesses WebSocket events.
II. Core Architecture Workflow
Gradio’s workflow is essentially a closed loop of “frontend-backend data flow + function calls,” with the following specific steps:
- Start the Service: When the user calls
launch(), the backend starts the Flask server, initiates the WebSocket service, and loads frontend static resources (React-built pages) into the browser. - User Interaction: The user enters data in the frontend interface (such as typing text in a
Textbox), triggering a frontend event (such as clicking the “Submit” button). - Data Transmission: The frontend serializes the input data (such as converting text to a string, or images to Base64 encoding) and sends it to the backend via WebSocket.
- Backend Processing
- The backend parses the serialized data and converts it into native Python types (such as strings, PIL Images, numpy arrays).
- Calls the user-defined
fnfunction (such as a model inference function) with the parsed parameters.
- Result Return: The output of the
fnfunction is serialized by the backend and pushed back to the frontend via WebSocket. - Interface Update: The frontend parses the returned results and re-renders the output area through React components (such as updating
Textboxcontent or displaying images).
Installation
First, ensure Python is installed (version 3.8+ is recommended), then install Gradio via pip:
pip install gradioYour First Gradio Application
Create a simple example: a function that takes text input and returns its uppercase form, wrapped into a web application using Gradio.
import gradio as gr

# Define a processing function (inputs and outputs can be of any type)
def greet(text):
    return text.upper()  # Convert input text to uppercase

# Create a Gradio interface: bind the function to input and output components
iface = gr.Interface(
    fn=greet,  # Function to be called
    inputs=gr.Textbox(label="Input your text"),  # Input component (text box)
    outputs=gr.Textbox(label="Result")   # Output component (text box)
)

# Launch the application (runs on local port 7860 by default)
iface.launch()
Save it as main.py and run it from the command line:
python main.pyAfter running the code, the terminal will display a local access address (usually http://localhost:7860). Open it in a browser, and you’ll see an interface with an input box and an output box. Enter text and click “Submit” to see the uppercase result.
Here’s what it looks like:
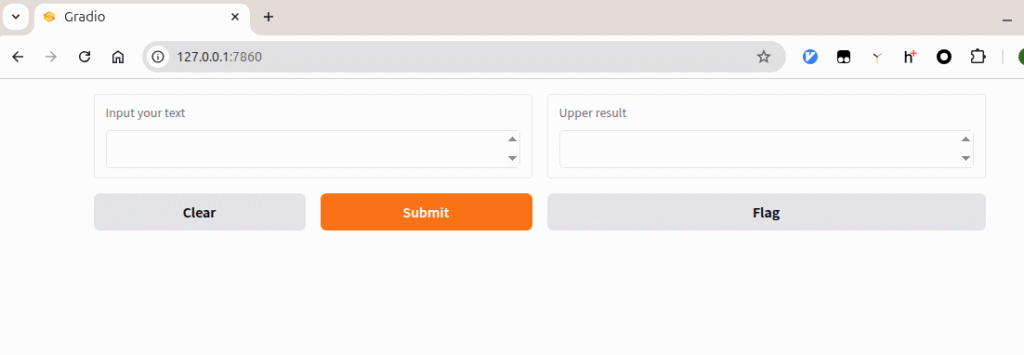
Type lowercase English words in the left input box, click the submit button, and the right text box will return the converted uppercase letters.
Looking at the code, isn’t it concise?
Step 3: Understand Core Concepts
The core of Gradio is the gr.Interface class, which associates functions with interactive components. Key parameters:
fn: The function to be wrapped (core logic).inputs: Input components (such as text, images, sliders).outputs: Output components (corresponding to input component types).title: Application title (displayed at the top of the web page).description: Application description (explanatory text below the title).
Step 4: Examples of Common Components
Gradio supports various input and output components. Here are some common examples:
1. Slider Input + Text Output
import gradio as gr

def calculate(x, y):
    return f"{x} + {y} = {x + y}"

with gr.Interface(
    fn=calculate,
    inputs=[gr.Slider(0, 100, label="Number 1"), gr.Slider(0, 100, label="Number 2")],  # Two sliders
    outputs=gr.Textbox(label="Calculation Result"),
    title="Simple Slider Calculator",
    description="Use the sliders to select two numbers and see their sum."
) as iface:
    iface.launch()
Save it as slider.py and run it from the command line:
python slider.pyHere’s the effect:
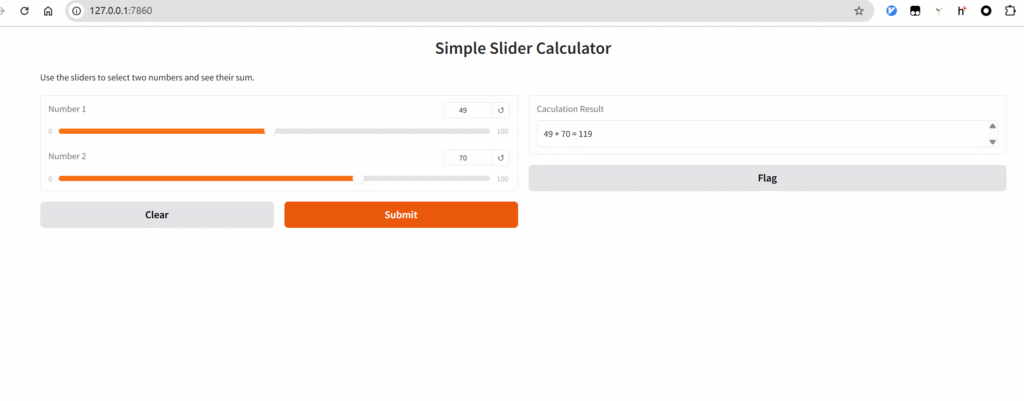
Drag the sliders to change the numbers, click submit, and the sum will be calculated and displayed on the right.
Note that the addition here is not a simple frontend calculation in the browser. Instead, it calls the backend addition function, retrieves the result, returns it to the frontend, and then renders the result.
2. Image Input + Image Output (Suitable for Image Processing)
import gradio as gr
import numpy as np

def invert_image(image):
    # Invert image (RGB value = 255 - original RGB value)
    return 255 - image

with gr.Interface(
    fn=invert_image,
    inputs=gr.Image(label="Input Image"),  # Supports upload or camera capture
    outputs=gr.Image(label="Inverted Image"),
    title="Image Inversion Tool"
) as interface:
    interface.launch()
Save it as input_image.py and run it from the command line:
python input_image.pyHere’s the effect:
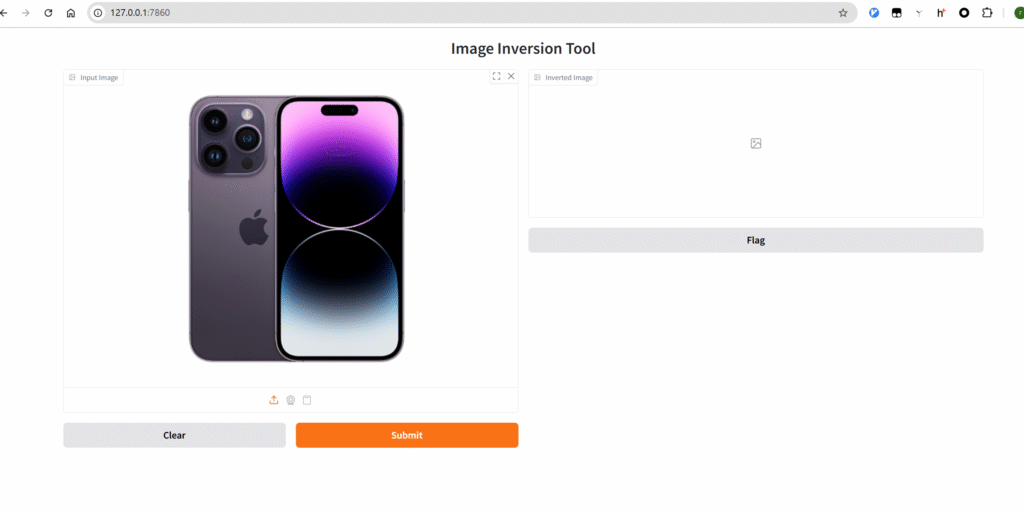
Click to upload an image, which will be sent to the backend, and the rendered result will be returned.
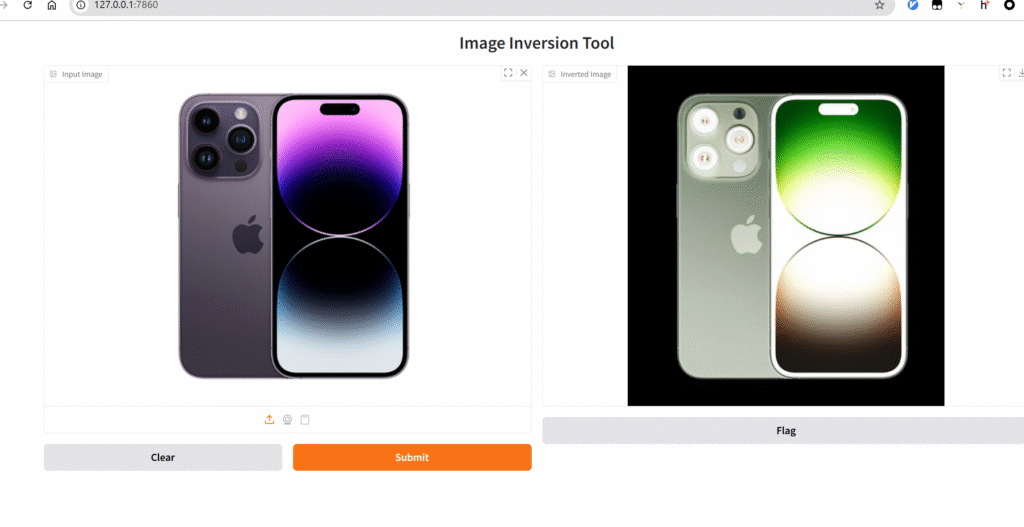
Because the code performs an inversion operation: 255 – image (i.e., color inversion), the final rendered image has colors opposite to the original.
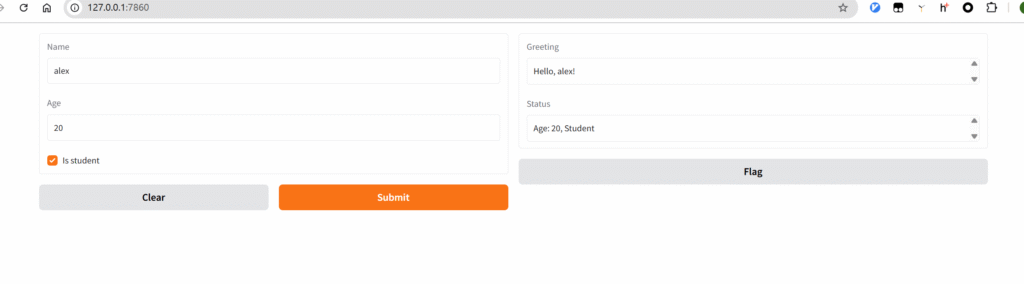
3. Multiple Inputs + Multiple Outputs
# ...existing code...
import gradio as gr

def process(name, age, is_student):
    greeting = f"Hello, {name}!"
    status = f"Age: {age}, {'Student' if is_student else 'Non-student'}"
    return greeting, status  # Return two results

with gr.Interface(
    fn=process,
    inputs=[
        gr.Textbox(label="Name"),
        gr.Number(label="Age"),
        gr.Checkbox(label="Is student")  # Checkbox
    ],
    outputs=[
        gr.Textbox(label="Greeting"),
        gr.Textbox(label="Status")
    ]
) as iface:
    iface.launch()
Run after saving the file, and you’ll get the following effect. There are 2 input fields and 2 corresponding output fields.
- Step 5: Advanced Features
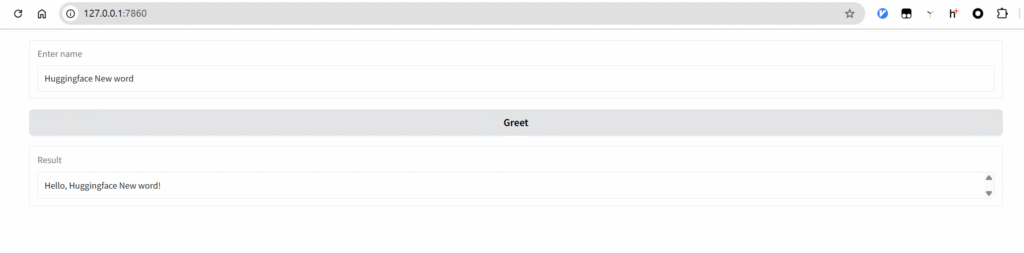
- Dynamically Update the Interface
gr.Blocksallows more flexible control over interface layout and interaction logic (more powerful thangr.Interface):
   import gradio as gr

   with gr.Blocks(title="Dynamic Interface Example") as demo:
       name = gr.Textbox(label="Enter name")
       greet_btn = gr.Button("Greet")
       output = gr.Textbox(label="Result")

       # Bind button click event
       def greet(name):
           return f"Hello, {name}!"
       greet_btn.click(fn=greet, inputs=name, outputs=output)

   demo.launch()
Here, the first click on “Greet” will refresh the data once. However, if you add new content to the input box and click “Greet” again, the page won’t refresh a second time—instead, the new content will be appended directly to the existing text.
- Share the Application
To temporarily share the application with others, add share=True when launching:
iface.launch(share=True) # Generates a temporary public link (valid for ~72 hours)- Loading Status Prompt
For time-consuming tasks, you can add a loading animation:
def slow_function(text):
    import time
    time.sleep(3)  # Simulate a time-consuming operation
    return text
gr.Interface(fn=slow_function, inputs="text", outputs="text").launch()
Gradio’s core advantage is “quickly converting functions into interactive interfaces,” making it especially suitable for demonstrating machine learning models (such as generating images from text input, or recognizing text from speech input). You can quickly build simple applications with gr.Interface and implement more complex interaction logic with gr.Blocks.