Python Web Crawling: Intercepting and Modifying Data Packets – Man-in-the-Middle Attack
Python MITM Proxy: Intercept & Modify Web Traffic
Use mitmproxy (Python 3.7+) to:
🛠️ Intercept HTTP/HTTPS traffic
✏️ Modify requests/responses dynamically
📊 Scrape data directly to MongoDB
🔄 Redirect/rewrite content via Python scripts
Ideal for web scraping, API testing, and security audits.
2025-10-20
When crawling data, the general process is to first access the target website through a browser, then press F12 to capture packets, analyze the data packets, write a program, and run the program to scrape the website data.
Tools like Fiddler can monitor traffic outside the browser and perform real-time analysis.
Is it possible to directly obtain data in the monitoring software, clean it, and store it?
The answer is yes.
That is the man-in-the-middle attack.
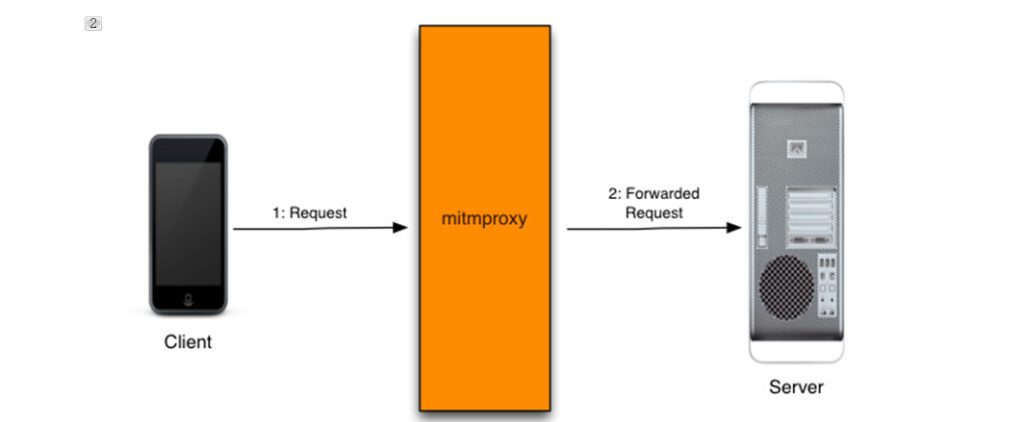
In this field, there is an established third-party Python library for capturing and modifying data packets, which is mitmproxy.
mitmproxy is a powerful open-source interactive HTTPS proxy tool commonly used in scenarios such as network debugging, traffic interception, and API testing.
Installation and Startup
Note that you need Python version 3.7 or higher to install mitmproxy. It is recommended to use a Conda virtual environment for installation to isolate it from the local Python environment.
The most powerful and commonly used mode is mitmdump. It can start the program to monitor all traffic, and the data can be read arbitrarily through Python functions.
mitmproxy can intercept not only HTTP requests but also HTTPS requests. The prerequisite is to install the mitmproxy certificate.
Installing the Certificate
First, run mitmproxy in the command line:
mitmdump
Or in windows OS
mitmdump.exe
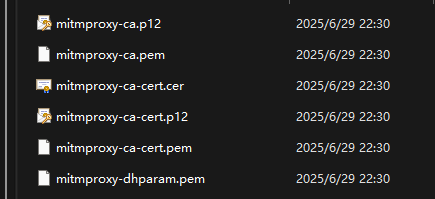
After running it once, the certificates will be generated in the following folder:
C:\Users\YourUsername.mitmproxy
Installing the certificate on Windows: Double-click mitmproxy-ca-cert.p12 directly, click “Next” all the way. When it comes to the certificate storage area, select “Trusted Root Certification Authorities”, and then continue to click “Next” until completion. (If there is a security prompt, click “Yes”.)
Installing the certificate on Android: Transfer the mitmproxy-ca-cert.cer to your phone by various means and click to install it using the certificate installer. (When capturing packets on your phone, make sure it uses the same Wi-Fi as your computer. This article only covers the use on Windows.)
Manual Proxy Configuration
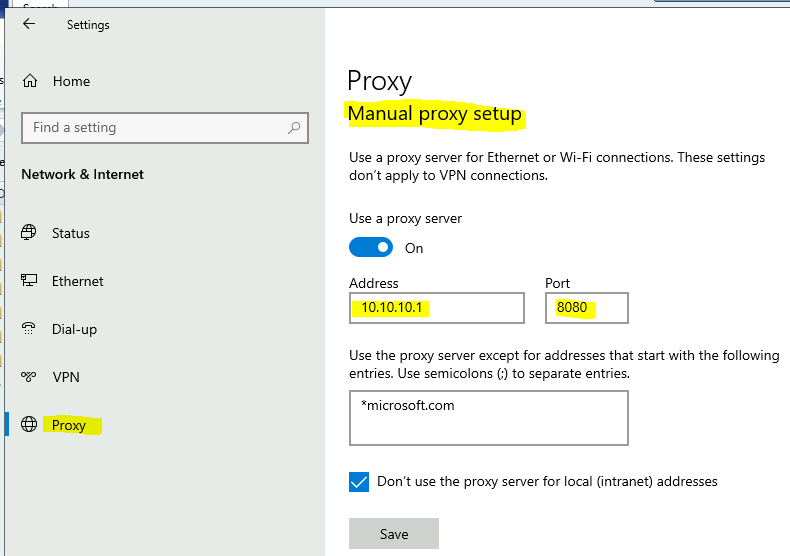
To route data through the mitmproxy library, you need to use a proxy and configure it manually:
Right-click the network icon in the bottom right corner, select “Open Network & Internet settings”, then choose “Proxy”, turn on the “Use a proxy server” switch, and set the address and port. The port you set should match the port configured when running mitmproxy. The default is 127.0.0.1:8080. You can also use the following command to specify the listening port:
mitmweb -p 8888
At this time, the listening port is: 127.0.0.1:8888
Therefore, the proxy should also be set to: 127.0.0.1:8888
Then, execute the following command in the command line to pass in the processing function script:
mitmdump -s mitmproxy_demo.py -p 9001
At this point, mitmproxy_demo.py will be started while the proxy is opened, and the functions will be used to process requests or responses. It listens on the local port 9001.
On the Windows environment, you need to configure the proxy settings.
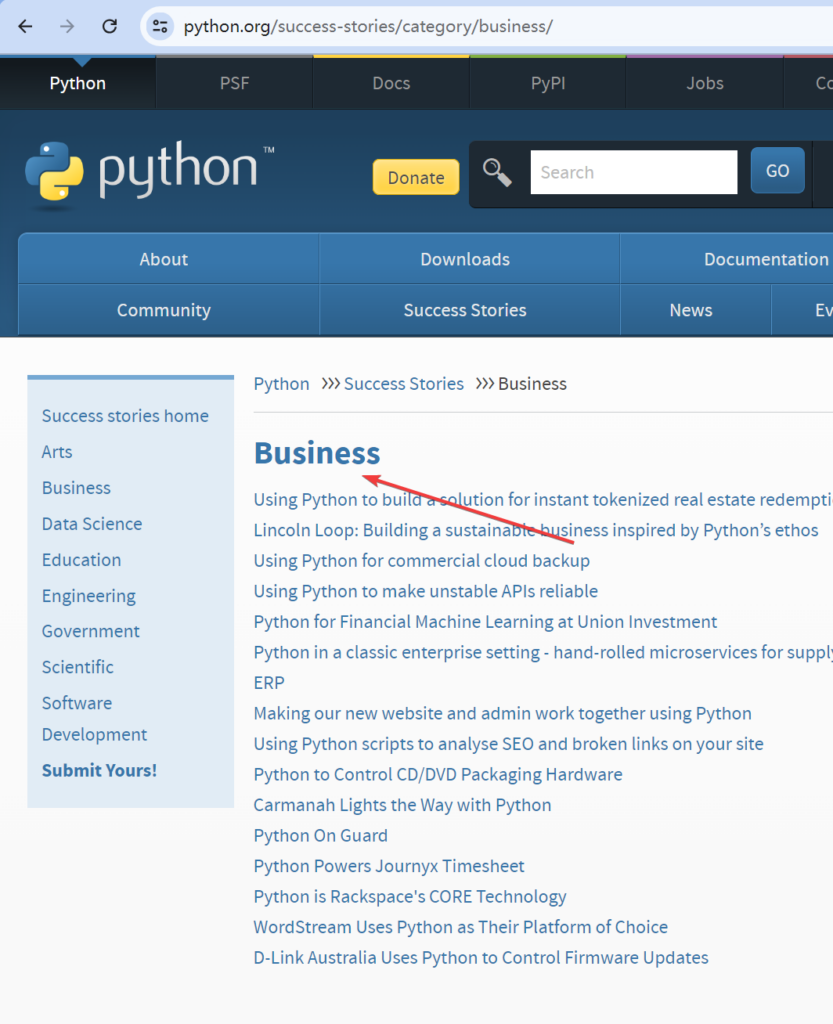
Let’s take the python.org website as an example to illustrate how to use mitmproxy.
After running the above mitmdump monitoring command, open your browser and visit the site: python.org
We need to access the titles and URL links in the red box.
The sample code is as follows:
from parsel import Selector

def request(flow):
    pass


# process response body
def response(flow):
    res = flow.response  # response object
    url = flow.request.url  # request URL

    if 'python.org' in url:

        encoding = 'utf-8'
        content = res.content.decode(encoding, errors='replace')
        resp = Selector(text=content)
        nodes = resp.xpath('//ul[@class="menu success-story-category"]/li').getall()
        for node in nodes:
            title = Selector(text=node).xpath('.//a/text()').get()
            link = Selector(text=node).xpath('.//a/@href').get()
            if title and link:
                print(f'Title: {title.strip()}, Link: {link.strip()}')
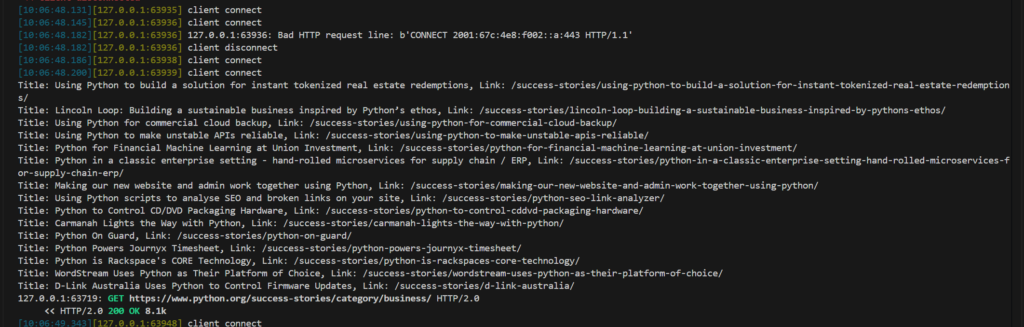
After opening the webpage in the browser for a moment, you can see the parsed results output on the screen by mitmdump.
This also means that you can save the data to a database.
Note that by default, mitmdump outputs a lot of redundant information, which can significantly interfere with the content we want to output. You can add -q when starting it to enable silent mode and avoid outputting this data.
mitmdump -s proxy_demo.py -p 9001 -q
Saving Data to a Database
For example, the following sample code stores the data monitored by mitmdump into MongoDB.
from parsel import Selector

client = pymongo.MongoClient('127.0.0.1')
db = client['db_spider']
doc = db['python_org']

def save_data(item_dict):

    try:
        doc.insert_one(item_dict)
    except Exception as e:
        return False
    else:
        return True


def request(flow):
    pass


# process response body
def response(flow):
    res = flow.response  # response object
    url = flow.request.url  # request URL

    if 'python.org' in url:

        encoding = 'utf-8'
        content = res.content.decode(encoding, errors='replace')
        resp = Selector(text=content)
        nodes = resp.xpath('//ul[@class="menu success-story-category"]/li').getall()
        for node in nodes:
            title = Selector(text=node).xpath('.//a/text()').get()
            link = Selector(text=node).xpath('.//a/@href').get()
            if title and link:
                save_data({'title':title,'url':link})
Modifying the Response Content
Now, when we visit the page: https://www.python.org/success-stories/category/business/, the content looks like this:
Then, by modifying the monitoring script code, we can replace the response content.
import re

def response(flow):
    url = flow.request.url  # request URL

    if 'python.org' in url:
        print('content modified for:', url)
        flow.response.content = re.sub(rb"<h1>Business</h1>", b"<h1>Hello World</h1>", flow.response.content)
Modifying the Response Header Data
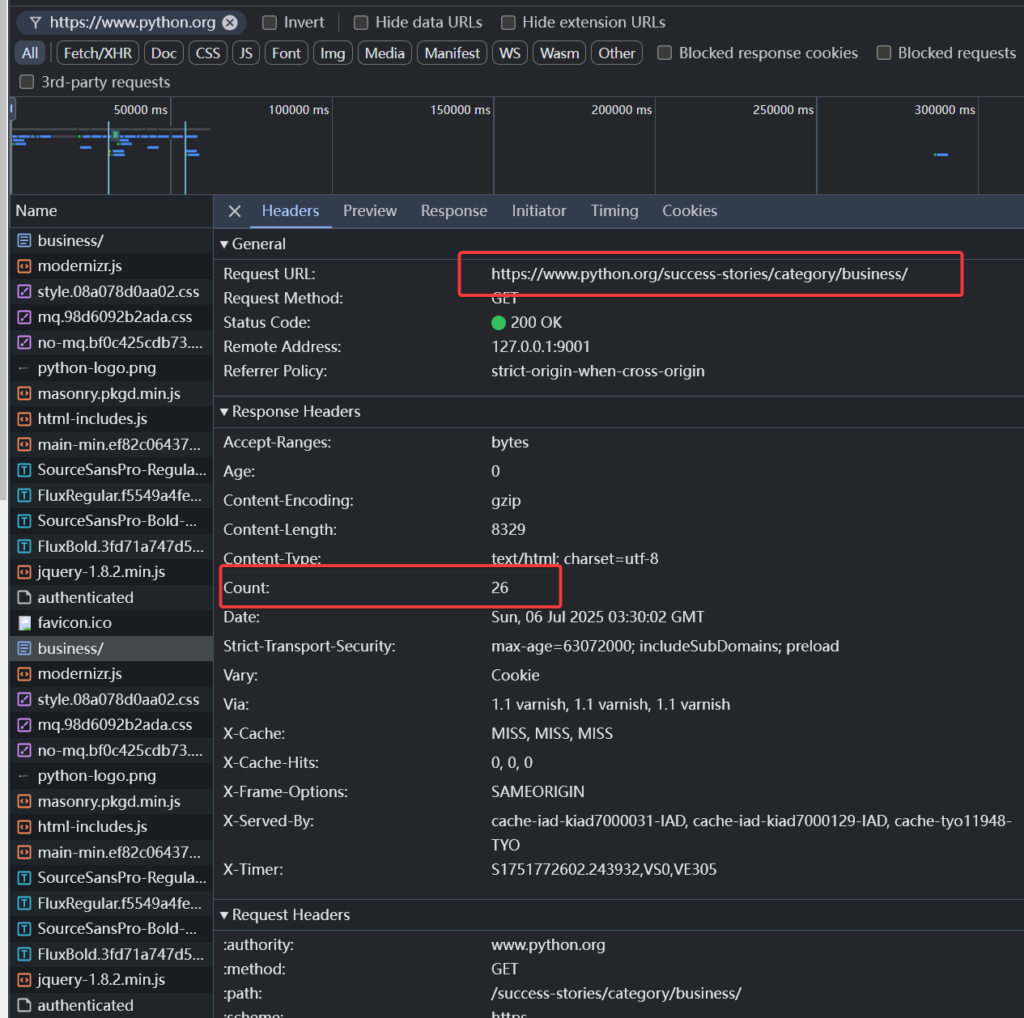
Here, we use the plugin form to run the code. The following code counts the number of times the python.org domain is accessed. Each time the python.org domain is accessed, the value of num is incremented by 1. Then, a count field is added to the returned response headers to store the value of num.
"""Add an HTTP header to each response."""


class AddHeader:
    def __init__(self):
        self.num = 0

    def response(self, flow):
        url = flow.request.url  # request URL

        if 'python.org' in url:
            self.num = self.num + 1
            flow.response.headers["count"] = str(self.num)


addons = [AddHeader()]
Then, in the F12 console of the browser, check the response value of the request with the domain name python.org.
You can see that there is a Count field in the response, and its value is a number. Each time you access python.org, this value will increment by 1.
In addition to adding attributes, we can also modify any attributes in the response. For example, we can modify the status code to always be 200.
We can also play a prank by slowing down the browsing speed. The following statement makes us wait for 5 seconds before returning the content each time.
In the request function, we can also perform many operations. For example, we can perform arbitrary redirections.
For example, if we don’t like using the Baidu search engine, the following Python script can monitor if the input is a Baidu address and redirect you to Google.
def request(flow: http.HTTPFlow) -> None:
  if 'baidu.com' in flow.requst.url:
      flow.request.url = "https://google.com"
Overall, mitmproxy is a programmable data packet editor similar to Nginx and Fiddle, based on the Python language.
With it, there is no data that cannot be obtained.